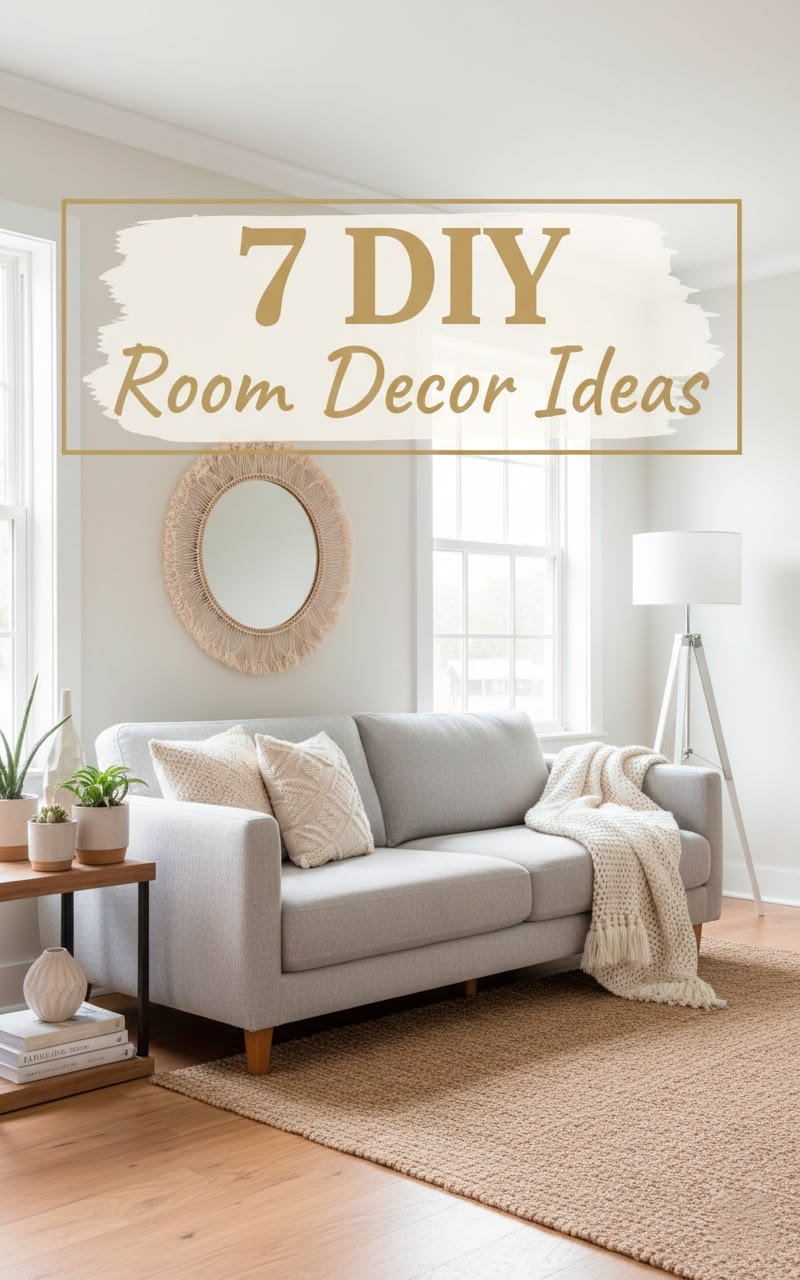
Introduction to DIY Home Decor
Do-it-yourself (DIY) home decor has gained substantial popularity among homeowners and renters alike. This creative movement allows individuals to personalize their living spaces, making them truly their own. Engaging in DIY projects not only offers an opportunity for self-expression but also serves as a rewarding and practical alternative to purchasing ready-made items.
One of the most significant benefits of embracing DIY home decor is the considerable cost savings it can provide. Many homeowners find that creating their decor can come at a fraction of the price of store-bought alternatives. By sourcing materials from thrift stores, recycling old furniture, or using inexpensive craft supplies, individuals can achieve aesthetically pleasing results without burning a hole in their wallets.
Additionally, DIY home decor projects contribute to sustainable living. By repurposing existing items or using eco-friendly materials, participants can reduce waste and minimize their environmental impact. This approach not only beautifies their space but also fosters a sense of responsibility towards the planet.
Beginner-friendly DIY projects can be quite simple and are perfect for those looking to dip their toes into the world of home decor. These projects often require minimal tools and basic skills, making them accessible for anyone, regardless of their experience level. Painting a wall, creating wall art, or making handmade cushions are examples of starter projects that can have a significant impact on a room’s ambiance.
Overall, the world of DIY home decor invites individuals to harness their creativity while enjoying the numerous advantages that come with it. As beginners explore the realm of personalized decor, they not only enhance their living environment but also embark on a journey of self-discovery and creative growth.
Essential Tools and Materials for Beginners
Engaging in DIY home decor projects can be an exciting venture, particularly for beginners looking to enhance their living spaces. To facilitate a smooth creative process, it is crucial to have the right tools and materials at hand. Here is a list of essential items which every novice DIY enthusiast should consider adding to their toolkit.
Firstly, paint is a fundamental component of many home decor projects. It is advisable to choose quality paint suitable for your specific project, whether it’s for a wall, furniture, or decorative items. Alongside paint, a variety of brushes will be necessary. Different brush sizes and shapes can aid in achieving precise finishes.
Scissors are another indispensable tool; they are required for cutting paper, fabric, and other materials. For more advanced projects, a utility knife might also be beneficial for achieving clean cuts. Additionally, a crafting mat will protect your surfaces while providing a designated work area.
Adhesive materials, such as glue or double-sided tape, are critical for attaching items together. Craft glue works well for lightweight materials, whereas hot glue guns are preferred for heavier items. If fabric is involved, a sewing kit containing needles, thread, and fabric scissors can be useful.
Finally, a measuring tape and ruler are essential for ensuring accuracy in your projects. These tools will help you measure dimensions correctly before cutting or adhering materials, allowing for professional-looking results.
By equipping yourself with these basic tools and materials, beginners can set themselves up for success in their DIY home decor endeavors. As skills and projects become more intricate, additional tools may be acquired, but starting with the essentials will help build a solid foundation.
Project 1: Customized Wall Art
Creating customized wall art is an engaging project that allows you to express yourself and enhance your living space without incurring significant costs. This DIY home decor project can be accomplished using inexpensive and readily available materials, making it ideal for beginners.
To embark on this creative journey, assemble basic materials that suit your vision. Depending on your preference, you may need items such as canvas boards, paint, old magazines, scrap fabric, or even natural elements like leaves and flowers. Once you have gathered your materials, the next step is to choose a color palette and style that resonates with your aesthetic. Selecting hues that reflect your personal taste can significantly influence the overall look of your customized wall art.
The first step in this DIY project is to sketch out your design on paper. This preliminary plan can help you visualize your piece before committing paint or materials. Consider incorporating geometric shapes, abstract designs, or even a meaningful quote that could add a personal touch to your artwork. Once your design is clear, transfer it onto your chosen canvas using light pencil strokes.
Now, it’s time for the creative part. Start applying paint to your canvas or arranging your materials as per your design. For those using paint, layering colors can produce depth and a more dynamic appearance. If you are working with fabric or paper, use a strong adhesive to secure your items in place. Allow your customized wall art to dry completely before displaying it in your home.
This project not only enhances your decor but also provides a fulfilling sense of accomplishment. Custom wall art can serve as a conversation starter and a unique representation of your personal style, making it a perfect addition to any household.
Upcycled Furniture Makeover
Upcycling furniture is a fantastic way to breathe new life into outdated pieces while showcasing your creativity. This process not only revitalizes your home decor but also promotes sustainability by reducing waste. To begin your upcycling journey, select a piece of furniture that you believe can be transformed into something unique—whether it be an old chair, a neglected table, or a vintage dresser.
The first step in your transformation is sanding. Begin by removing any existing paint or finish using a power sander or sandpaper. This stage is crucial as it creates a smooth surface for the new coat of paint or finish to adhere properly. Pay attention to any areas with chips or dents, as these will need additional smoothing to ensure a flawless final product.
Once you’ve prepared the surface, it’s time to choose your paint. Opt for a high-quality chalk paint or acrylic paint that can provide a beautiful finish. A light sanding between coats can enhance adhesion and provides a more polished result. You may want to opt for bold colors or even soft pastels, depending on your aesthetic preference. Consider using multiple colors to create a striking contrast or soft gradients.
To take your upcycled furniture project a step further, consider incorporating stencils or decoupage techniques. Stencils allow you to add designs, patterns, or even inspiring quotes onto the furniture surface, giving a personal touch. Decoupage involves adhering decorative paper, fabric, or images to the surface, adding an intricate layer that showcases your style.
Finally, finish your piece with a protective clear coat to ensure its longevity and to prevent wear and tear. Upcycled furniture not only serves as functional decor but also reflects personal stories and creativity. This project is a perfect introduction to the world of DIY home decor, demonstrating that the possibilities are endless when it comes to transforming ordinary items into extraordinary treasures.
Project 3: DIY Candle Holders
Creating stylish candle holders is a rewarding DIY project that can significantly enhance the ambiance of any room. Utilizing simple materials like mason jars or wood scraps allows beginners to craft unique pieces that reflect their personal style. This section will provide a comprehensive guide to making various designs of candle holders, discuss material selection, and offer tips on arrangement for optimal aesthetic appeal.
To begin, mason jars are an excellent choice for novice crafters due to their accessibility and versatility. These jars can be dressed up with paint, twine, or glitter to match your home decor theme. Start by cleaning and drying the jars thoroughly. You may choose to paint the exterior in a color that complements your space, or leave it clear for a more rustic look. To create a stunning effect, consider coating the inside with metallic paint for a reflective shine when lit with a candle.
For a wood-based alternative, repurpose scraps from previous projects. Cut the wood into desired shapes, such as circles or squares, and drill holes of appropriate size to hold tea lights or pillar candles. Sanding the edges will ensure a smooth finish. You may opt to stain or varnish the wood for a polished look, or leave it raw for a natural, earthy feel. Additionally, combining different heights and shapes creates an interesting visual display, especially when grouped together on a mantle or table.
Finally, it is essential to consider the placement of these candle holders within your space. Grouping them in clusters can create warmth and invitation, while a few statement pieces can serve as focal points. With limitless possibilities in design and arrangement, DIY candle holders offer a delightful way to personalize your home with a warm, inviting glow.
Project 4: Decorative Throw Pillows
Creating decorative throw pillows is an accessible and enjoyable DIY project for beginners looking to enhance their home decor. Custom throw pillows can significantly transform a living space, allowing for easy integration of styles, colors, and textures that reflect personal taste. Whether you aim to refresh your cushions or add personalized touches to your sofa, the following steps will guide you through the process.
The first step in this undertaking is to select the right fabric. It is crucial to choose a material that complements your existing decor. Popular choices include cotton, linen, or canvas, which are all durable and easy to sew. Look for fabrics with patterns or colors that align with your design scheme; this will create a cohesive look in your home. Additionally, consider the weight of the fabric—heavier materials can offer a sophisticated touch, while lighter fabrics lend a more casual vibe.
Color coordination plays a vital role in the overall aesthetic appeal of your pillows. When choosing colors, think about the color wheel; complementary colors can make a bold statement, while analogous colors create harmony. To tie the whole room together, consider incorporating an accent color from other decorative elements, such as artwork or curtains. This practice not only unifies the decor but also ensures the throw pillows are visually pleasing.
Once you have selected your fabric and determined your color palette, the next step involves utilizing simple sewing patterns. Beginners can start with basic shapes such as squares or rectangles, which are the easiest to sew and can be customized with various embellishments, such as appliqué or fabric paint. By mastering various techniques, you can create unique designs that showcase your creativity and elevate your home’s aesthetic.
Project 5: Plant Terrarium
Creating a plant terrarium can enhance your home decor with a touch of greenery while offering a rewarding DIY experience. A terrarium is a miniature garden housed within a clear container, allowing for easy management and care of plants. To begin this project, selecting the right container is crucial. Glass jars, fish bowls, or specially designed terrarium containers are ideal as they provide a clear view of the plants while allowing light to penetrate.
When it comes to choosing suitable plants, consider low-maintenance varieties such as succulents, ferns, or mosses that thrive in humid environments. Succulents are particularly popular for terrariums due to their resilience and ability to adapt to varying moisture levels. Ensure the chosen plants have similar light and watering requirements to facilitate their growth together.
Next, prepare the base of your terrarium. Begin by placing a layer of small stones to create drainage, followed by activated charcoal to prevent odor buildup. Afterward, add a layer of potting soil that suits the plants you have selected. This structured approach not only enhances plant health but also contributes to the overall aesthetic appeal of your terrarium.
Once you have arranged the plants in the soil, personalize your terrarium with decorative elements like colorful pebbles, miniature figurines, or driftwood, adding a unique touch that reflects your style. Maintenance is fairly straightforward; ensure that your terrarium is placed in indirect sunlight and monitor moisture levels closely. A closed terrarium will need less frequent watering than an open one, as it retains humidity effectively.
The incorporation of a plant terrarium into your home decor not only brings the beauty of nature indoors but also improves air quality, creating a serene atmosphere. Whether displayed on a shelf or used as a centerpiece, a terrarium serves as an engaging focal point that can be enjoyed throughout the year.
Project 6: Stylish Shelves
Floating shelves offer a modern and clean way to display your belongings, whether it’s books, plants, or decorative items. Installing these stylish shelves can greatly enhance the aesthetic of any room in your home. To begin, you will need to gather the necessary materials such as wood planks, shelf brackets, a drill, a level, and a measuring tape.
The first step in creating your floating shelves is measuring the wall space where you intend to install them. Determine the height and length that will best suit your decor and ensure ample space for your items. Mark these measurements with a pencil, as this will guide the placement of the brackets.
Next, secure the brackets to the wall. Use a stud finder to locate the wall studs for a strong and stable installation. By anchoring the brackets into the studs, you will ensure that your shelves can hold the weight of decor and books without risk. For added security, pre-drill holes in the wall before inserting screws to avoid splitting the wood. Once the brackets are securely fastened, it is time to place the wooden planks on top, ensuring they are level.
Now that your shelves are installed, consider how to style them. Use a combination of decorative items such as framed photos, potted plants, or antique finds to create visual interest. Group items in odd numbers and vary their heights to create a balanced look. Don’t hesitate to mix textures and materials to add depth. For example, combine wooden elements with metal accents or ceramics to enrich the overall design.
With these simple steps, you can achieve stylish shelves that not only serve a functional purpose but also elevate the overall ambiance of your home. Embrace your creativity by playing around with different configurations until you arrive at the perfect display.
Conclusion and Encouragement
In this blog post, we explored ten beginner-friendly DIY home decor projects that can transform your living space while offering a creative outlet. From crafting personalized wall art to refurbishing furniture, these projects are designed to inspire both new and seasoned DIY enthusiasts alike. Each project encourages the use of creativity and resourcefulness, allowing individuals to express their personal style in unique ways.
As you embark on your DIY journey, remember that each project is an opportunity to learn and grow. The skills developed through these endeavors not only enhance your home decor but also provide a sense of accomplishment. Do not hesitate to experiment with different materials, colors, and techniques – your home should reflect who you are.
Additionally, sharing your creations with friends and family can foster community and offer opportunities for feedback and encouragement. Consider documenting your projects on social media or a personal blog to inspire others just beginning their DIY adventures. Engaging with fellow DIYers can yield fresh ideas and countless techniques that can broaden your home decor repertoire.
The world of home decor is vast and continuously evolving, so it is essential to remain open to experimentation. Each project has the potential to enhance not only your living space but also your creative skills. So, gather your materials, channel your imagination, and dive into these exciting projects. You may find that each new endeavor leads you closer to discovering your true aesthetic. Happy crafting!