Hanging pictures above your couch can transform the entire look and feel of a room. It’s an opportunity to showcase your personality, create visual interest, and bring life to those blank walls. Whether you’re displaying treasured family photos or stunning artwork, finding the right way to arrange them is key. In this guide, we’ll take you through each step of hanging pictures above your couch with confidence and style. Say goodbye to boring walls and hello to a beautiful gallery that reflects who you are!
The Importance of Hanging Pictures Above a Couch
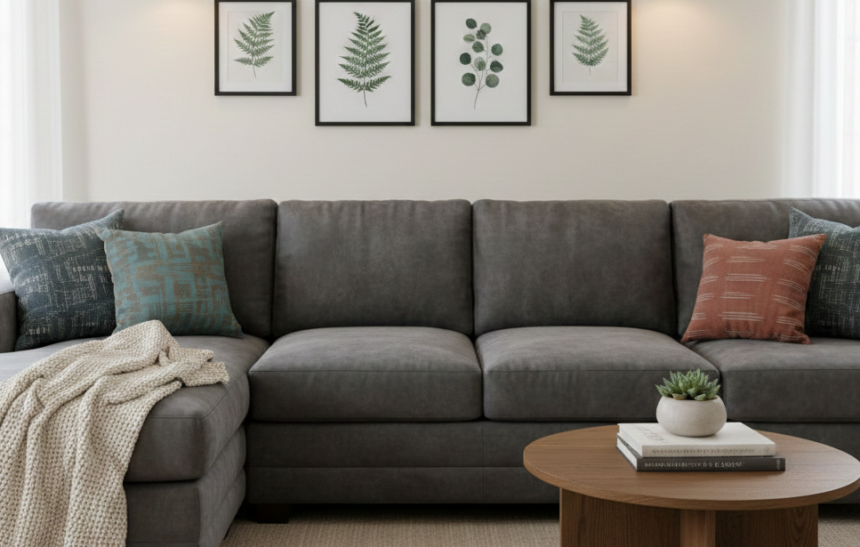
Hanging pictures above couch isn’t just about decoration; it’s about creating a focal point in your living space. This area often serves as the heart of your home, where family gathers and friends are entertained.
Artwork brings warmth and character to this shared zone. It invites conversation and adds a personal touch that reflects your style. The right arrangement can enhance the overall aesthetic, making the room feel more cohesive.
Moreover, artwork can draw attention upward, giving the illusion of higher ceilings and larger spaces. When done thoughtfully, it unifies various design elements in the room—from color schemes to furniture styles—creating harmony within your décor.
By choosing meaningful images or striking designs, you also set an emotional tone for the space. Each piece tells a story or invokes memories that enrich everyday moments spent in that cozy corner of your home.
Choosing the Right Size and Placement
Choosing the right size for your pictures is crucial. Generally, aim for art that covers about two-thirds of the couch’s width. This creates a balanced look without overwhelming the space.
When it comes to placement, consider eye level. The center of your artwork should ideally be 57 inches from the floor. This height ensures everyone can appreciate the pieces without craning their necks.
Visualize how different sizes will interact with each other. A large statement piece can anchor smaller images around it, creating a dynamic gallery feel.
Don’t forget about negative space—leaving some wall visible enhances focus on your pictures. Try various arrangements before committing to nails and hooks; this exploration can lead you to an exciting display that feels just right in the room.
Tools and Materials Needed
Before you start transforming your wall, gather the essential tools and materials. First on the list is a good measuring tape. Accurate measurements are crucial for achieving that perfect alignment above your couch.
Next, grab a level to ensure each piece hangs straight. There’s nothing worse than crooked frames disrupting your aesthetic flow.
You’ll also need picture hooks or nails suitable for your frame’s weight. Invest in sturdy options for added security and peace of mind.
Don’t forget about a pencil for marking spots on the wall; it’s key to avoid unwanted holes during this process.
Consider having a hammer handy if you’re using nails or hooks that require some muscle. With these essentials at the ready, you’re well-equipped to get started on hanging pictures above your couch like a pro!
Step 1: Measuring and Marking the Wall
Start by determining the ideal height for your pictures. A common rule is to hang artwork at eye level, typically around 57 to 60 inches from the floor. This ensures that your pieces are easily seen and appreciated.
Next, use a measuring tape to find this height on the wall above your couch. Mark it lightly with a pencil. You want a precise line since this will be your guide throughout the process.
Measure the width of your couch as well. Centering artwork above furniture creates balance in any room design, so make sure you note where each end of the couch lies relative to your marks.
Double-check all measurements before proceeding. Accurate markings set you up for success when hanging those beautiful frames later on!
Step 2: Prepping the Picture Frames
Prepping your picture frames is a crucial step in the process. It sets the tone for how everything will look when hung above your couch. Start by cleaning each frame with a soft cloth to remove dust and smudges. A clean surface ensures better adhesion for any hanging hardware you’ll be using.
Next, check that the glass or acrylic is secure within the frame. Loose elements can lead to accidents later on. If you’re using multiple frames, consider mixing textures and colors for visual interest but maintain some commonality in style to keep them cohesive.
Make sure each frame has proper hanging hardware installed—D-rings or wire work best for stability. Before diving into hanging, lay out all your frames on the floor first to visualize their arrangement. This allows adjustments without making unnecessary holes in your wall!
Step 3: Hanging the Pictures
Now it’s time to bring your vision to life. Start by aligning the top of each frame with the marks you made earlier. This ensures a uniform look.
Use a level tool for accuracy. A straight line is essential, especially if you’re hanging multiple pieces together. Adjust as needed before committing to any nails or hooks.
If your pictures come with mounting hardware, attach them securely now. For heavier frames, consider using wall anchors for support. They help distribute weight evenly and minimize damage.
When everything’s in place, gently hang each picture on its designated spot. Step back frequently to ensure they align well and create visual harmony across the couch area.
Take your time during this step; patience pays off in achieving that polished finish you desire!
Tips for Creating a Cohesive Gallery Wall
Creating a cohesive gallery wall can transform your living space. Start by selecting a unifying theme, whether it’s color, style, or subject matter. This will help pieces feel connected.
Consider varying the frame styles but keep them in the same color palette. Mixing modern with vintage can add intrigue while maintaining harmony. Play around with different sizes; larger pieces can anchor smaller ones.
Lay out your arrangement on the floor before committing to the wall. This allows you to visualize spacing and balance without any commitment. Don’t be afraid to include unexpected items like mirrors or shelves for added depth.
Leave enough space between each piece—about 2 to 5 inches is ideal—to prevent overcrowding. Remember that art doesn’t have to match perfectly; sometimes contrasting elements create a dynamic visual story that feels intentional and lively.
Alternative Options for Hanging Pictures Above a Couch
If traditional frames aren’t your style, consider using clipboards or washi tape. These options allow for easy swapping of art and photos. You can change the look whenever inspiration strikes.
Another creative approach is hanging a large tapestry or fabric piece instead of multiple pictures. This adds texture and warmth to your space.
For a three-dimensional vibe, try floating shelves above the couch. They let you display both artwork and decorative items like plants or books.
Magnetic strips are also an interesting choice. Attach art with magnets for a clean look that allows flexibility in arrangement.
Don’t forget about wall decals and vinyl stickers as alternatives to framed pieces. They’re perfect for adding personality without committing to holes in the wall.
Conclusion
Hanging pictures above a couch can transform your living space into a personal gallery that reflects your style and taste. It adds character and warmth to the room, creating an inviting atmosphere for you and your guests. Remember that the key elements include selecting the right size, ensuring proper placement, and using suitable tools.
As you embark on this creative endeavor, take time to measure accurately. Prepping your picture frames will make installation easier. Follow each step methodically for a polished look.
Don’t forget to consider alternative options such as floating shelves or leaning art if traditional hanging isn’t your preference. The possibilities are endless when it comes to showcasing your favorite pieces.
Embrace this opportunity to personalize your home with meaningful artwork that resonates with you!